Deploy infra using Terraform and Azure DevOps pipelines
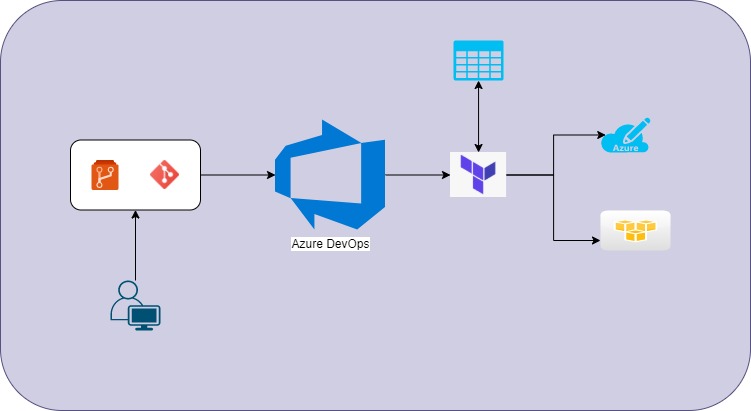
In this article, I’m going to discuss how to deploy the infrastructure using Terraform and Azure DevOps. Azure DevOps is a single pane of glass (All your DevOps tools set in one place) where you can manage the entire project portfolio starting from the scrum, repos, CI/CD, and artifacts. And, terraform is an IaC tool that helps you to build and deploy the infrastructure. Using terraform, you can deploy the infrastructure on Private and Public clouds. And all you need is to represent the infra components as API objects.
One of the advantages of the IaC is that you can version the infrastructure and manage it as the application code that developers do. Azure DevOps helps you to streamline the process of Infrastructure deployment efficiently. The following is the step-by-step guide to deploy the terraform templates using Azure DevOps.
Note: By default, you cannot run the terraform unless you have a self-hosted agent with terraform. However, Azure DevOps allows you to install the extensions to run the terraform tasks as part of your pipeline.
The following are the two extensions that are used mostly.
- Terraform Installer

- Terraform CLI

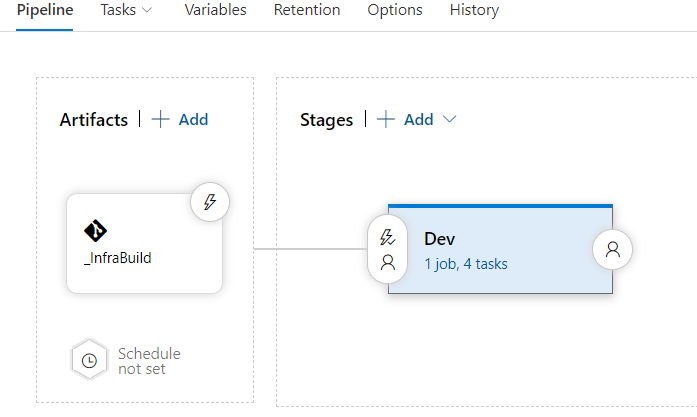
Navigate to the Releases and create new Release pipeline as below.
- Add the artifacts as input to the Azure DevOps release pipeline.
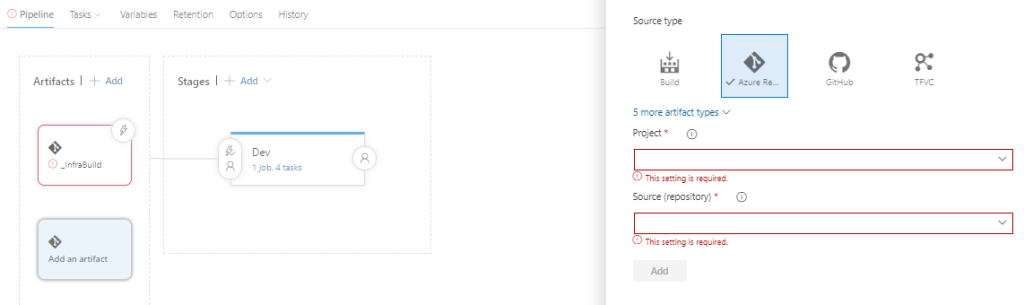
Here you can choose the source repository for the terraform configuration files. Likewise, you can choose any build artifacts.
2. Add stage for stages and choose Empty job template
3. Now add the agent tasks. For the terraform tasks, search in the task list with terraform keyword. If the extensions are already installed, then you will be able to see the tasks as below.
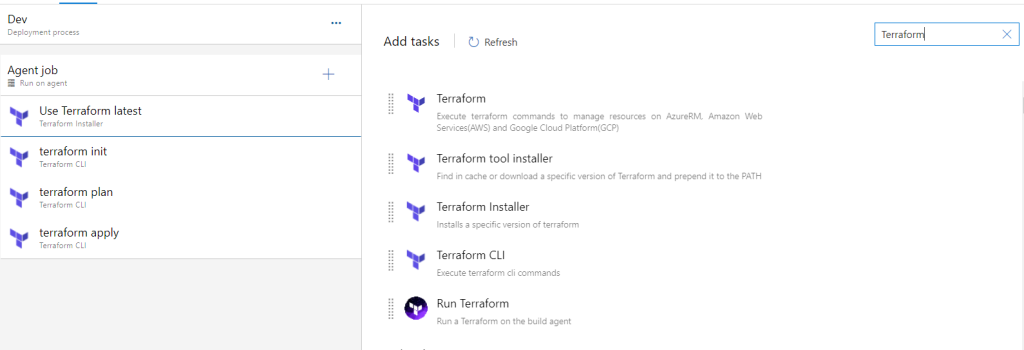
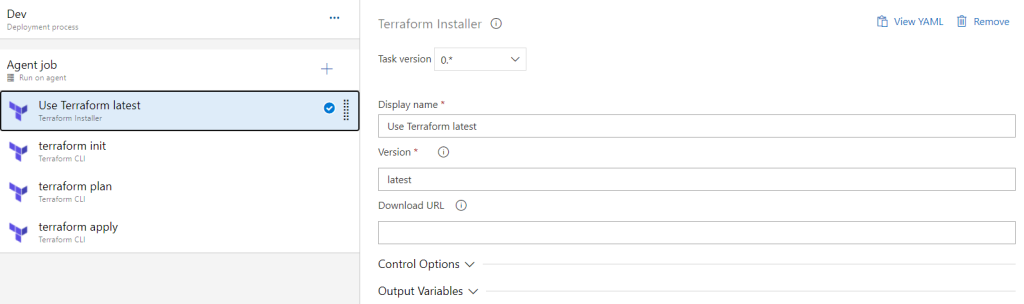
4. Choose Terraform installer task as the first task for the agent. This task will install the terraform on the agent. You can configure the task to use a particular version. By default, the latest version will be installed.
5. Now, add three Terraform CLI tasks for three commands i.e. init, plan and apply. Configure the first Terraform CLI task as below.
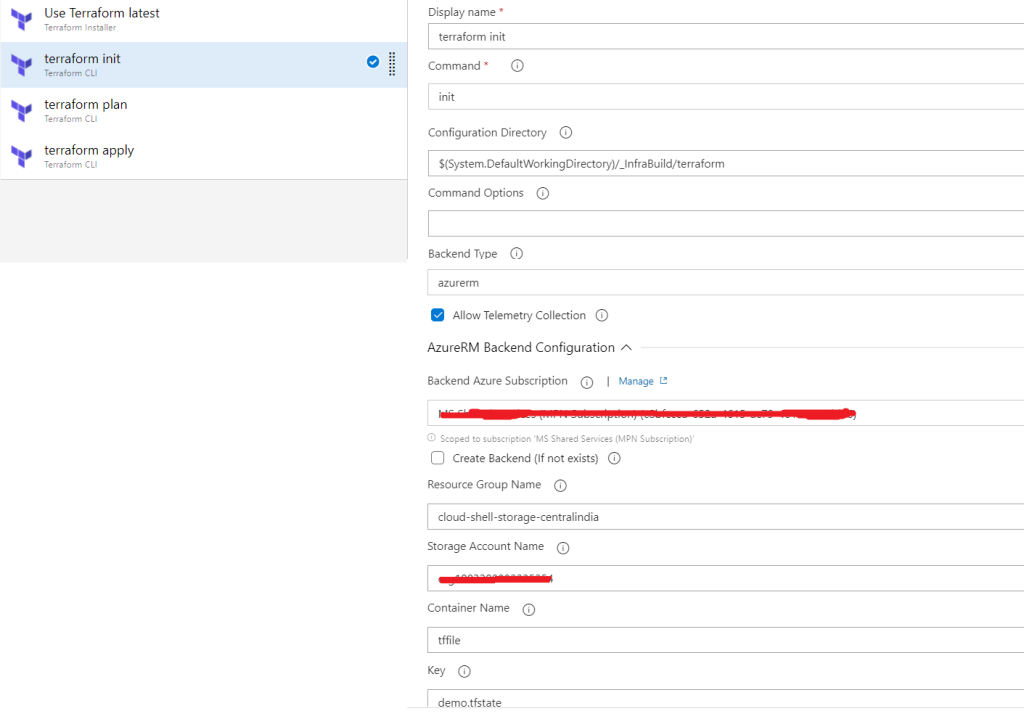
Configure the task as below.
- Rename the display name
- Choose the init command from the drop-down
- Configuration directory allows you to browse the terraform configuration files from the artifacts that you have added
- By default, the state file will be stored on Agent and you will lose it since the cleanup takes place post the job completion and we are not sure we will get the same agent in the next run. You can choose to store it on Azure Storage. For this, you need to configure BackendType as azurerm and add the details such as subscription, storage account along with container name, and the blob name i.e. terraform.tfstate
Note: To store the state file, you also need to add a piece of code as below along with the task configuration above.
provider "azurerm" {
    version = "=2.0.0"
    features {}
}

terraform {
    backend "azurerm" {
    }
}

resource "azurerm_resource_group" "rg" {
    name = var.rg_name
    location = var.location
    tags = {
        Owner = "CloudTechiee"
    }

}
6. Configure the next Terraform CLI task as below.
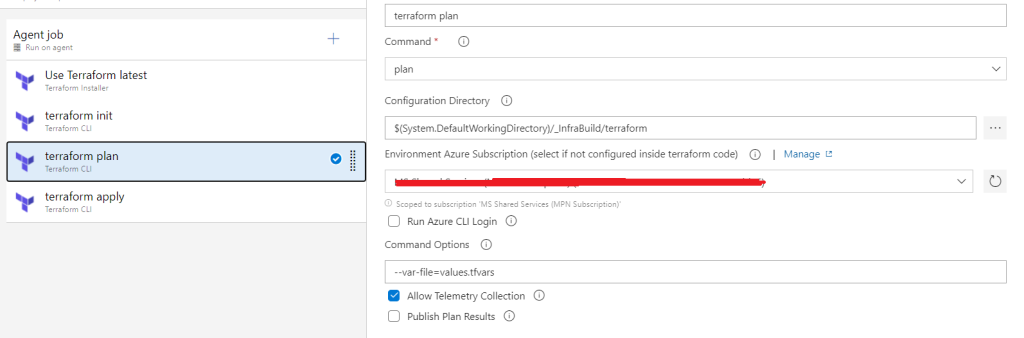
Configure the task as below.
- Rename the display name
- choose the plan command from the drop-down
- Configuration directory allows you to browse the terraform configuration files from the artifacts that you have added
- Choose the subscription from the available list subscription for you to use
- If you have a tfvar file in the artifacts, you can still it using the command options i.e. –var-file demo.tfvars
7. Configure the last Terraform CLI task as below
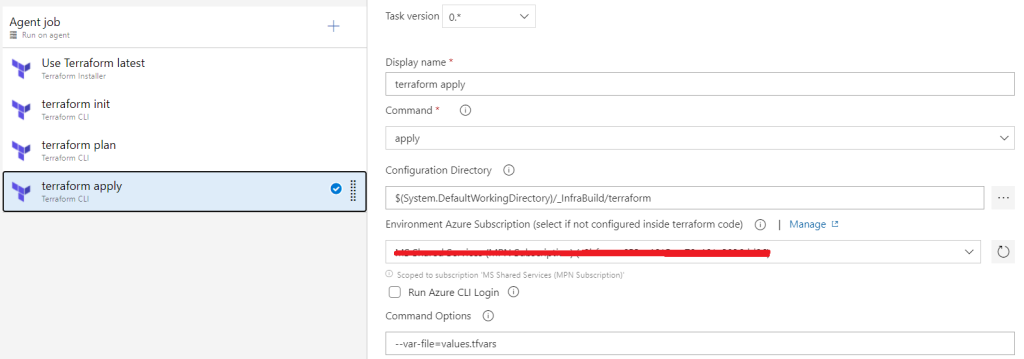
Configure the task as below.
- Rename the display name
- choose the apply command from the drop-down
- Configuration directory allows you to browse the terraform configuration files from the artifacts that you have added
- Choose the subscription from the available list subscription for you to use
- If you have a tfvar file in the artifacts, you can still it using the command options i.e. –var-file demo.tfvars
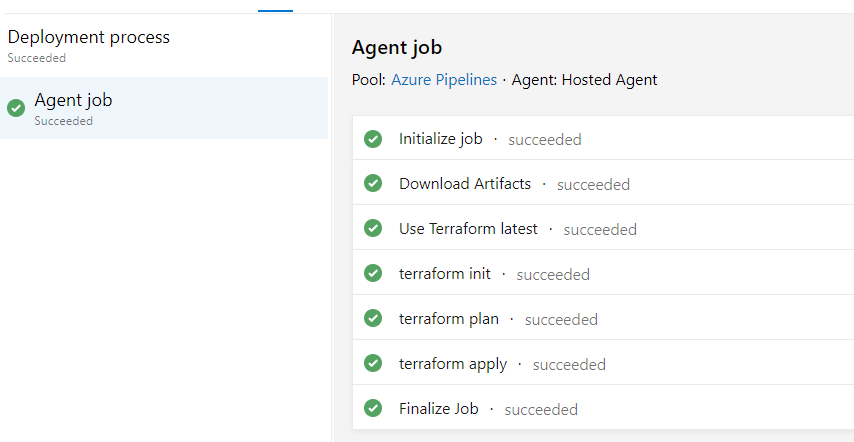
Save the pipeline. Create a release to trigger the pipeline. Once it is executed, it should be shown something like below.
You can add multiple stages to the pipeline such as Dev, QA and Prod to build the environments.
Likewise, you also destroy the environments using Azure DevOps. Sometimes, you may have to work with multiple Azure Subscriptions using terraform. Refer to Working with Multiple subscriptions blog.
Hope you find the article useful.